ShopDreamUp AI ArtDreamUp
Deviation Actions

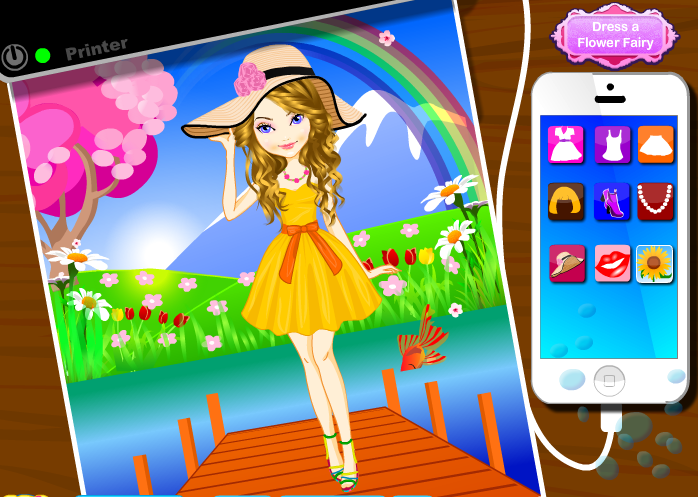
When people generally think about using a complex and powerful graphics program such as Photoshop CS2, they expect it to be used to create ads, signs, Web page graphics or retouched photos for magazines. However, there are many less serious uses for Photoshop CS2, such as creating games for your children. One you might create dress up games based on your photos or those of your children. While this might seem like an intimidating project, it is in fact quick and straightforward.
Instructions
1. Load images of yourself and your children onto your computer by copying them from a digital camera or by scanning in printed versions. Also scan in images of clothing that you would like to use for your dress-up game. Save all the images to a single folder on your desktop.
2. Open Photoshop. Select "File" from the menu and choose "New." In the dialog that appears, enter the width and height you want for your cut out dress up doll. Name the document "Paper Doll." Click "OK."
3. Click on the "New Layer" button at the bottom of the "Layers" palette. Go to the tool palette and select the "Pen" tool. In the tool options that appear at the top, set the tool to "Shape Layer" and choose a light beige as the fill color.
4. Use the "Pen" tool to draw out the shape of your doll. This should be simply the body, including the head, torso, arms and so on.
5. Select "File" from the menu and choose "Open." In the dialog that now appears, go to the folder you saved all of your images to. Select one of the images and open it. Right click on the background layer and from the options choose "Duplicate Layer." Select the "Paper Doll" as the "Destination." Repeat this to bring all the images in the folder into the "Paper Doll" document.
6. Go back to the "Paper Doll" document. You will see that all the images from your folder now appear as layers in your document. Click on the little eyes next to the layers to hide all the image layers except one with a picture of you or your child.
7. Select the "Polygonal Lasso" tool from the tool palette. Use it to draw a selection around the head and neck of the person in the image. Choose "Select" from the menu and choose "Inverse." Now hit "Delete" on your keyboard. Use the "Scale" function found under "Edit" to resize the head so it will fit over the head you drew for the doll. Hide this layer and unhide the next one.
8. Repeat step seven to create cutout heads as well as cutouts of the clothing you want to use. Hide all the image layers. Print out the doll figure on card stock. Hide the doll layer and unhide one of the image layers containing either a piece of clothing or a head. Then print a copy of this as well on regular paper. Repeat this to print out one copy of every head and piece of clothing.
9. Use a pair of scissors to cut out the doll and the other images. For the heads and clothing, you want to leave paper tabs that can be folded over to make the head or clothing stay on the doll.
When people generally think about using a complex and powerful graphics program such as Photoshop CS2, they expect it to be used to create ads, signs, Web page graphics or retouched photos for magazines. However, there are many less serious uses for Photoshop CS2, such as creating games for your children. One you might create latest dress up games based on your photos or those of your children. While this might seem like an intimidating project, it is in fact quick and straightforward.
Instructions
1. Load images of yourself and your children onto your computer by copying them from a digital camera or by scanning in printed versions. Also scan in images of clothing that you would like to use for your dress-up game. Save all the images to a single folder on your desktop.
2. Open Photoshop. Select "File" from the menu and choose "New." In the dialog that appears, enter the width and height you want for your cut out dress up doll. Name the document "Paper Doll." Click "OK."
3. Click on the "New Layer" button at the bottom of the "Layers" palette. Go to the tool palette and select the "Pen" tool. In the tool options that appear at the top, set the tool to "Shape Layer" and choose a light beige as the fill color.
4. Use the "Pen" tool to draw out the shape of your doll. This should be simply the body, including the head, torso, arms and so on.
5. Select "File" from the menu and choose "Open." In the dialog that now appears, go to the folder you saved all of your images to. Select one of the images and open it. Right click on the background layer and from the options choose "Duplicate Layer." Select the "Paper Doll" as the "Destination." Repeat this to bring all the images in the folder into the "Paper Doll" document.
6. Go back to the "Paper Doll" document. You will see that all the images from your folder now appear as layers in your document. Click on the little eyes next to the layers to hide all the image layers except one with a picture of you or your child.
7. Select the "Polygonal Lasso" tool from the tool palette. Use it to draw a selection around the head and neck of the person in the image. Choose "Select" from the menu and choose "Inverse." Now hit "Delete" on your keyboard. Use the "Scale" function found under "Edit" to resize the head so it will fit over the head you drew for the doll. Hide this layer and unhide the next one.
8. Repeat step seven to create cutout heads as well as cutouts of the clothing you want to use. Hide all the image layers. Print out the doll figure on card stock. Hide the doll layer and unhide one of the image layers containing either a piece of clothing or a head. Then print a copy of this as well on regular paper. Repeat this to print out one copy of every head and piece of clothing.
9. Use a pair of scissors to cut out the doll and the other images. For the heads and clothing, you want to leave paper tabs that can be folded over to make the head or clothing stay on the doll.
When people generally think about using a complex and powerful graphics program such as Photoshop CS2, they expect it to be used to create ads, signs, Web page graphics or retouched photos for magazines. However, there are many less serious uses for Photoshop CS2, such as creating games for your children. One you might create latest dress up games based on your photos or those of your children. While this might seem like an intimidating project, it is in fact quick and straightforward.
Instructions
1. Load images of yourself and your children onto your computer by copying them from a digital camera or by scanning in printed versions. Also scan in images of clothing that you would like to use for your dress-up game. Save all the images to a single folder on your desktop.
2. Open Photoshop. Select "File" from the menu and choose "New." In the dialog that appears, enter the width and height you want for your cut out dress up doll. Name the document "Paper Doll." Click "OK."
3. Click on the "New Layer" button at the bottom of the "Layers" palette. Go to the tool palette and select the "Pen" tool. In the tool options that appear at the top, set the tool to "Shape Layer" and choose a light beige as the fill color.
4. Use the "Pen" tool to draw out the shape of your doll. This should be simply the body, including the head, torso, arms and so on.
5. Select "File" from the menu and choose "Open." In the dialog that now appears, go to the folder you saved all of your images to. Select one of the images and open it. Right click on the background layer and from the options choose "Duplicate Layer." Select the "Paper Doll" as the "Destination." Repeat this to bring all the images in the folder into the "Paper Doll" document.
6. Go back to the "Paper Doll" document. You will see that all the images from your folder now appear as layers in your document. Click on the little eyes next to the layers to hide all the image layers except one with a picture of you or your child.
7. Select the "Polygonal Lasso" tool from the tool palette. Use it to draw a selection around the head and neck of the person in the image. Choose "Select" from the menu and choose "Inverse." Now hit "Delete" on your keyboard. Use the "Scale" function found under "Edit" to resize the head so it will fit over the head you drew for the doll. Hide this layer and unhide the next one.
8. Repeat step seven to create cutout heads as well as cutouts of the clothing you want to use. Hide all the image layers. Print out the doll figure on card stock. Hide the doll layer and unhide one of the image layers containing either a piece of clothing or a head. Then print a copy of this as well on regular paper. Repeat this to print out one copy of every head and piece of clothing.
9. Use a pair of scissors to cut out the doll and the other images. For the heads and clothing, you want to leave paper tabs that can be folded over to make the head or clothing stay on the doll.
Get a Beautiful Mandy and Turn Lock Wallet
For all the ladies out there who love bags, Vera Bradley has brought up an amazing offer. Now you can buy a super cute Mandy and a very handy Turn Lock Wallet together in a bundle offer using Vera Bradley Coupons and save a bunch of money!
Mandy and Turn Lock Wallet: The Super Combo
Ask any woman what is her favorite handbag. Most of them will answer that her favorite bag is a shoulder bag with small handles. The reason behind this choice is that these bags are easier to carry. One such bag is the Mandy from Vera Bradley. Using Vera Bradley Free Shipping Promo Code you get amazing Mandy handbags and receive free shipping services inside the
Fashionable Winter Clothes for Teens
Most of us look forward to winter and the holiday season. It makes us think of gingerbread, endless school holidays, cosy lie-ins and the best parties of the year. Of course, it also means making some serious changes to our wardrobes. It's time to pack away your summer dresses and short shorts and slip into some of winter's latest styles.
Not sure what you're gonna wear this season? No problem. As long as you pick up some of these super trendy wardrobe essentials, you'll be able to mix-and-match your way through winter like a true fashionista.
Check out our list of 5 Fashionable Teenage Staples for fleshing out your Winter Wardrobe.
1) Ove
Halloween mask 2013
Knock, knock! Halloween is almost here and it is time to add the final touches to your costume. Worried about not having enough time to put together your scary character? No need! Halloween is still a few weeks away and let's be honest: a good costume, scary enough to make your friends dreaded, takes patience and effort. Discover some of the most wanted Halloween masks this year!
1. Can you imagine how a bonehead demon would look like? Well, I'm telling you, it's pretty terrifying! No, I haven't met one, just saw a Halloween mask with this model. So, if you're absolutely desperate about freaking out your friends and neighbors, go
Recipe of Christmas cake
Christmas is not complete without a traditional Christmas cake. Let learn to cook a Christmas cake as a gift in Christmas party of your family.
Ingredients
• 200g currants
• 600g raisins/ sultanas
• 250g mixed candied/ dried fruits – finely chopped
• 400ml brandy/ booze, plus extra for feeding (sherry, rum all work well)
• 100g dried sour or glace cherries
• 300g butter (at room temperature)
• 200g brown sugar
• 4 eggs
• 1 lemon
• 300g plain flour
• 2 tsp treacle
• 1 tsp ground cinnamon
• 150g ground almonds
• 150g walnuts (chopped)
• Mixed spices
How to make
• If you have time, the night before, place the dried fruit in a
© 2013 - 2024 kute89
Comments1
Join the community to add your comment. Already a deviant? Log In
Do You have PS CS6? Because I Really Need Help With CS6